What's the best formations and custom tactics for FUT in FIFA 22? FUT 22, or FIFA Ultimate Team, sees you assembling a squad of football superstars, both past and present, from a variety of clubs and leagues around the world. But before you can even begin to think about Players and Chemistry, you're probably going to want to determine the best formations and custom tactics for your team. This is because your formation will ultimately determine the type of positions you need to fill, while also affecting your approach on the pitch. As part of our FIFA 22 guide, we're going to share the best formations and custom tactics for FUT. If you need to know Best Controller Settings and Camera Settings, How to Make Coins in FUT, and When to Buy and Sell Players in FUT, then follow the links.
FIFA 22: Best Formations and Custom Tactics for FUT

The best formations for FUT in FIFA 22 will depend a lot on the Players you have available and exactly how you want to play on the pitch. If you're more a defensive player then you may want to consider going with a back five, which will help to prevent teams from scoring against you at the expense of you being able to effectively attack. Alternatively, you may prefer the even distribution of players that a 4-4-2 provides, giving you a stable rear-guard with enough midfielders to get the ball into your forwards.
It's always important to consider Chemistry: you're going to want to get the most out of your best players, so if you have two top strikers in your squad then you're probably going to want to think about using a formation that accommodates both of them, as opposed to keeping one on the bench. You can change the position of players using Position Items to retain good Chemistry, so think carefully about the personnel you have available and how you can bring them all together to create a formidable team.
Even if you don't necessarily have many great Players in your team yet, picking a formation can help you develop the kind of squad you want. Once you've settled on a structure and tactics for your team, then you can begin to think about the type of personnel you'll need to get the most out of it. Does your starting eleven rely on rapid wingbacks, shuttling up-and-down either side of the field? Or do you need a target man, capable of bringing the ball under control and facilitating attacking teammates? Selecting the best formations for FUT can really help give you a foundation to build from.
Remember, this article exists to give you inspiration and ideas, but is not necessarily definitive. While there are often metas in competitive games like FIFA 22, you should experiment and find the best formations and custom tactics that work for you and your Players. Don't be afraid to try out different line-ups and explore all of the different tools that the game gives you.
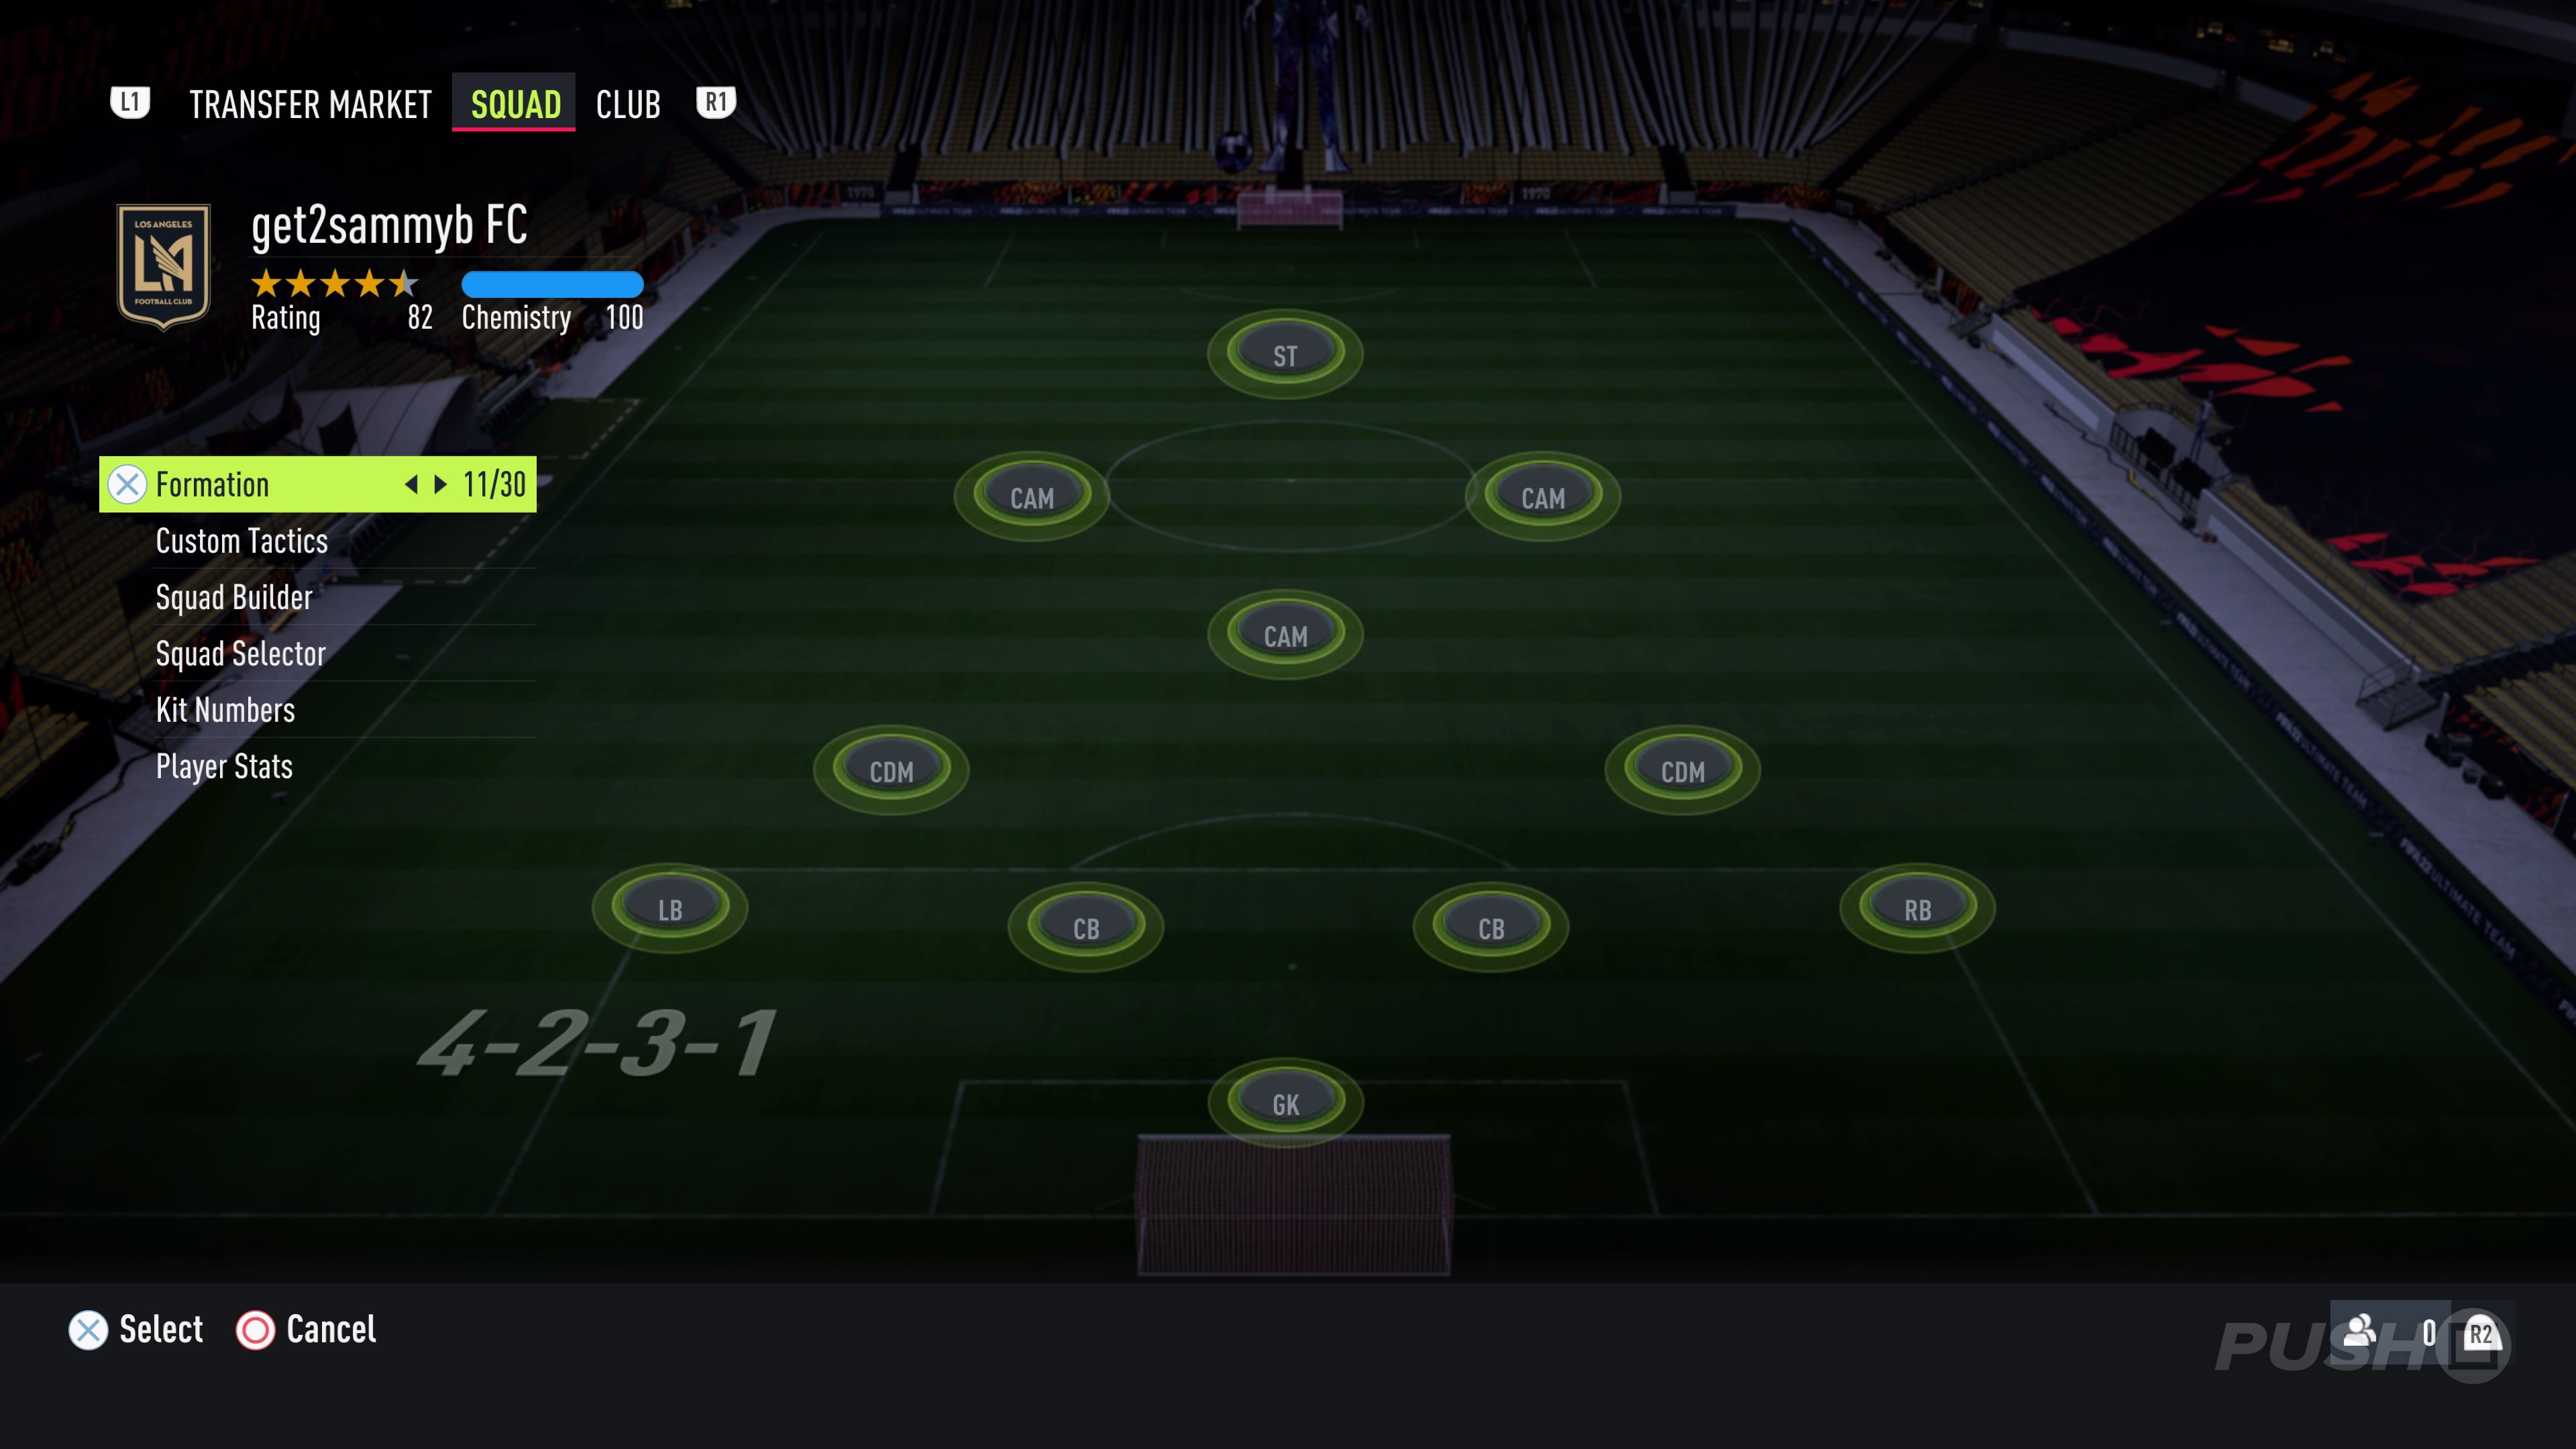
4-2-3-1
| Formation | Pros | Cons |
|---|---|---|
| 4-2-3-1 |
|
|
If you're struggling to shut out opponents in FIFA 22, then the 4-2-3-1 can be a great formation to utilise in order to give you a lot of defensive stability. Due to the way the game's designed this year, you're going to get a lot of support from your CDM players, who will shield your back four, assuming you've got your Custom Tactics assigned appropriately. This makes it a great formation to start out in or to switch to when you have a lead or are comfortably in front.
The downside is that you may not get much width from your attacking midfielders operating behind the striker, but you can offset this by using energetic fullbacks who can get up and down the pitch. Remember, you'll still have those two CDMs in front of your back four who can help you to mop up any potential counter-attacks should the situation arise. Alternatively, you can opt for the 4-2-3-1 Wide formation, which will give you a bit more width at the expense of some stability in the centre of the park.
Perhaps the only problem with this formation is that it can feel a little toothless in attack at times, but again you can offset this by encouraging your attacking midfielders to push forward or even hold their position up the field, helping you to break out more easily. Given how potent crossing is this year, you're going to want to instruct your wide attacking midfielders to get into the box, giving you options from your striker both in front of goal and at the far posts.
Custom Tactics
There's one major decision you'll need to make with your Custom Tactics for the 4-2-3-1: how defensive do you want to be? If you're primarily looking for stability at the back, then we'd recommend you keep your fullbacks in position during offensive possessions, and the same with your CDMs as well. If you're looking for a little more offensive potency, then you can put your fullbacks' Attacking Runs to Balanced, and even instruct one of your CDMs to get forward during attacks. If you do adopt these kind of tactics, however, make sure the other CDM stays back to give you some insurance.
Here are some of the Custom Tactics you should consider for the 4-2-3-1 formation. You can also tinker with the offensive width if you're looking to spray the ball about more, but do keep in mind that this will leave some gaps in the centre of the park if you do lose possession:
Defence
- Defensive Style: Balanced
- Width: 50
- Depth: 50
Offence
- Build Up Play: Slow Build Up
- Chance Creation: Forward Runs or Balanced
- Width: 60
- Players in Box: 5
- Corners: 2
- Free Kicks: 2
In addition, here are some Instructions for your Players that you may want to adopt as a starting point for the 4-2-3-1 formation. As always, feel free to play around with these Instructions and see what works best for your personal playstyle. As mentioned above, a lot of this will depend on how defensive or offensive you want to be:
| Position | Instructions |
|---|---|
| GK |
|
| LB |
|
| Left CB |
|
| Right CB |
|
| RB |
|
| Left CDM |
|
| Right CDM |
|
| Left CAM |
|
| Centre CAM |
|
| Right CAM |
|
| ST |
|
3-1-4-2

| Formation | Pros | Cons |
|---|---|---|
| 3-1-4-2 |
|
|
The great thing about the 3-1-4-2 is that you can set it up to be both defensive or offensive depending on what your situation demands. For example, if you're chasing a goal then you can push your wingers high up the pitch, creating overloads in attack while still having the defensive coverage in midfield to not give away any easy goals. If you've got tall, powerful strikers then this can be particularly effective, as the wide midfielders will be able to cross into the box for them to finish.
On the flip-side, if you've got a lead that you need to cling on to in the latter stages of a game, then you can switch to a more defensive formation by telling your wingbacks to fall back into defence. While this will come at the expense of width, it'll make it extremely challenging for opponents to break you down, especially with the defensive midfielder shuttling backwards and forwards in front of your backline.
You could also consider using a 3-4-1-2 here, which functions in much the same way as the 3-1-4-2 but replaces the CDM with a playmaking CAM to help feed your forwards. Obviously, this comes at the expense of some defensive stability, but will make you more potent on the attack, especially if you prefer to play a possession-based game in midfield with pacey forwards making runs into space upfront.
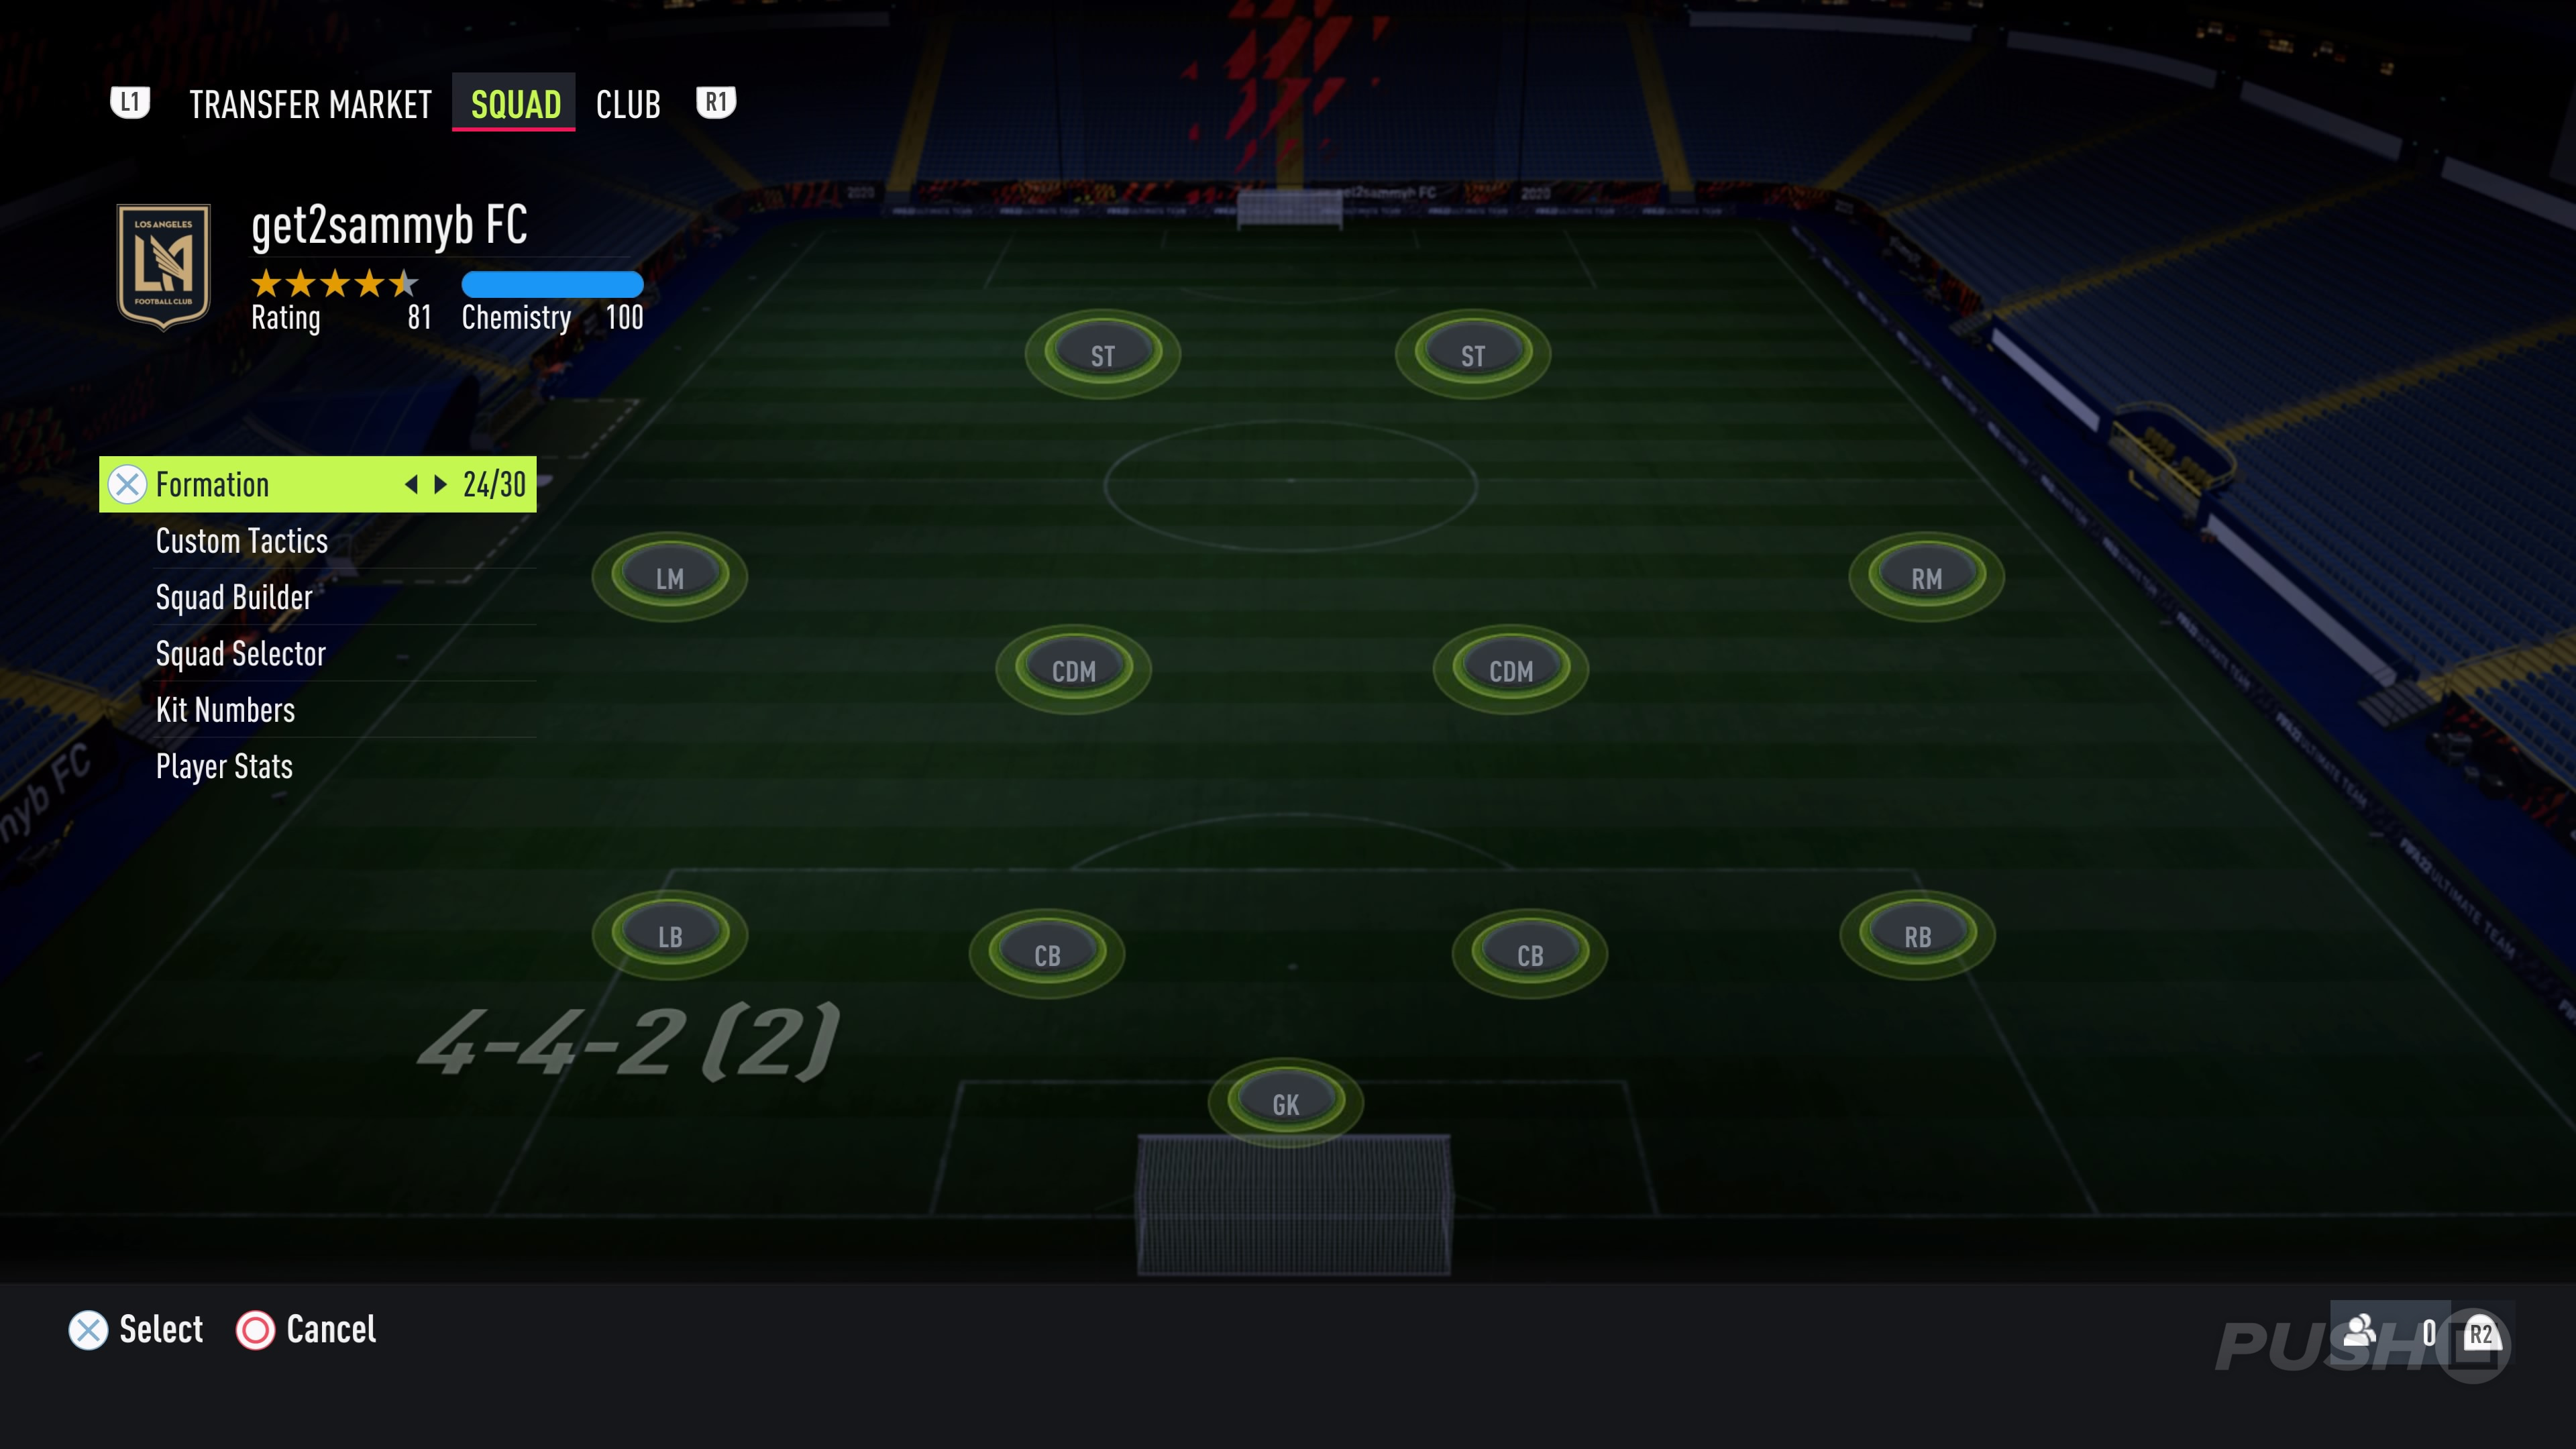
4-4-2 Holding
| Formation | Pros | Cons |
|---|---|---|
| 4-4-2 Holding |
|
|
While the 4-4-2 may be quite old-fashioned in the modern game, the 4-4-2 Holding formation is brilliantly balanced in FIFA 22 and gives you versatility in both defence and attack. While this is unquestionably a more conservative formation, with its second bank of four anchored by two CDMs, if you can command your wide midfielders to make overlapping runs into the box it can be deadly offensively while still commanding more than enough defensive stability to avoid ceding easy opportunities to your opponent.
You're probably going to want to instruct your fullbacks to stay back, especially if your wide midfielders are pushing forward to complement your attack, but you should have more than enough defensive cover from your CDMs to break up any potential counter-attacks.
There are a number of permutations of the 4-4-2 you could experiment with, including the 4-2-2-2 which is a lot more offensively minded at the expense of a little width. This alternative can be a little narrow and so will rely on your fullbacks providing necessary width, but it's flexible and with a couple of creative CAMs up front will result in a ton of goal scoring potential if you prefer to play through the middle.
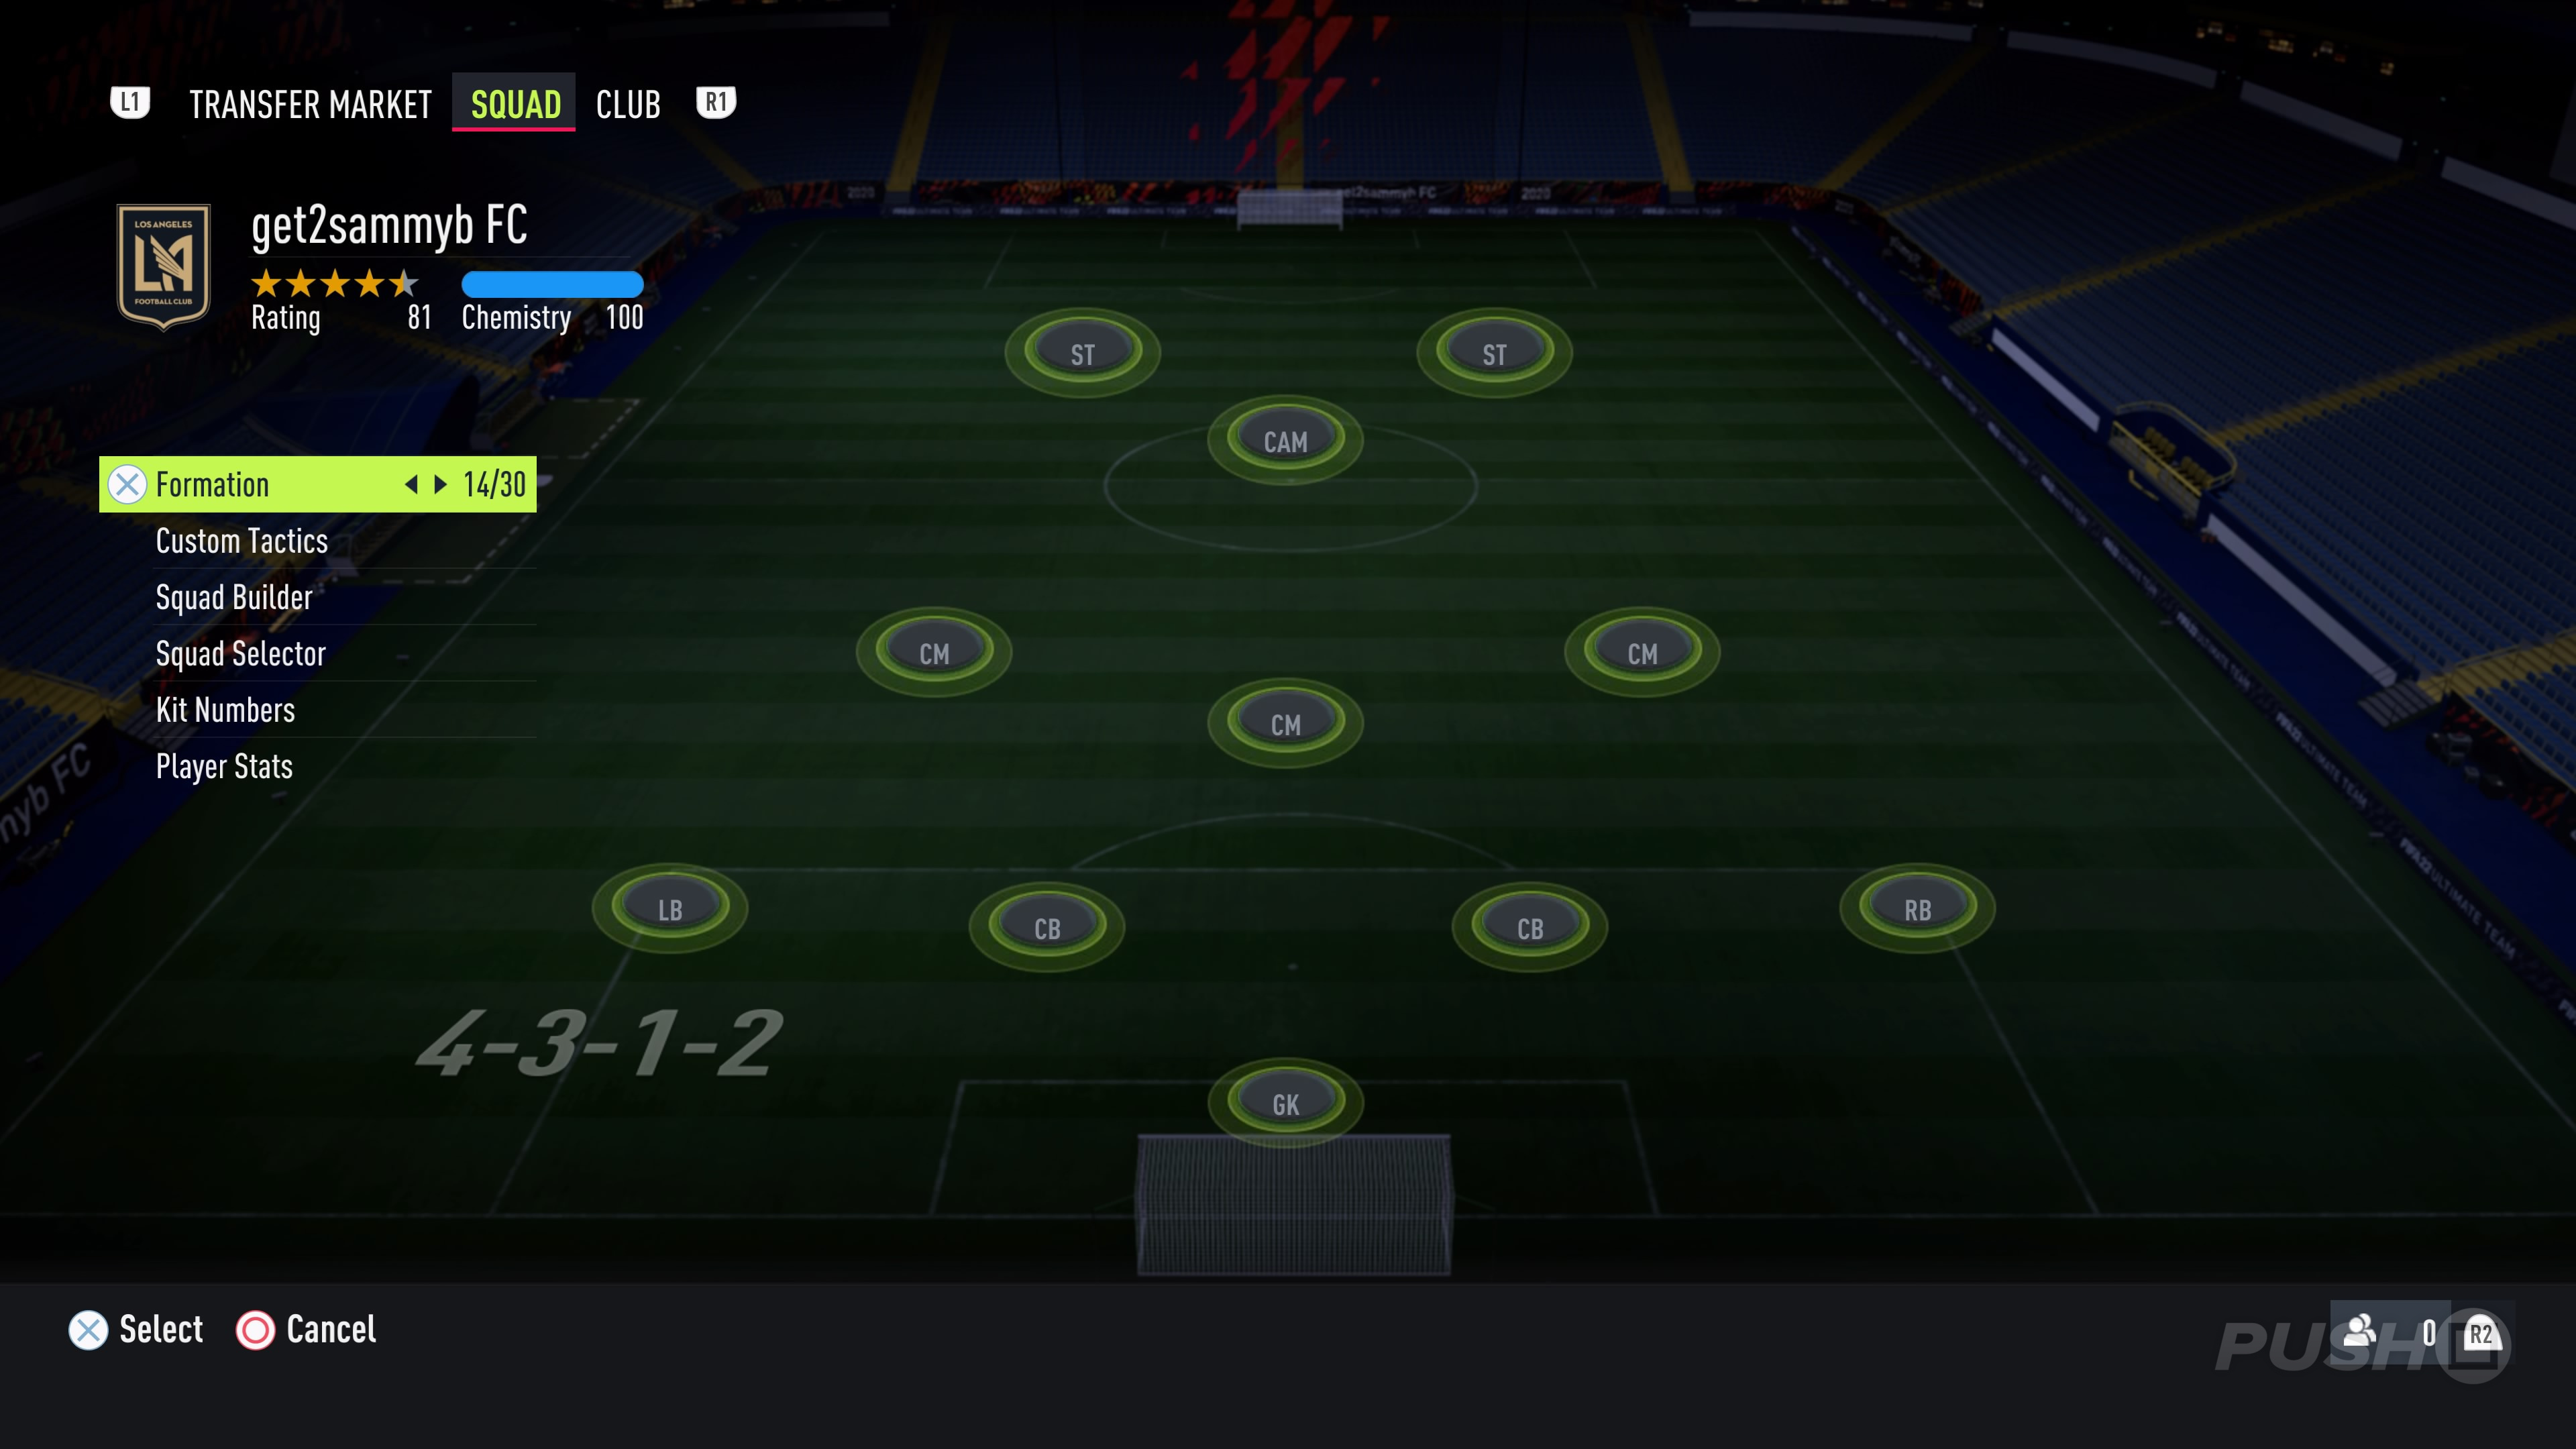
4-3-1-2
| Formation | Pros | Cons |
|---|---|---|
| 4-3-1-2 |
|
|
The 4-3-1-2 is compact in the middle and allows you to play a possession-based game, using your fullbacks to provide width in both offensive and defensive areas. This formation is effective at flooding the midfield, meaning that it can be used to foil to formations like 4-4-2, although it relies on energetic fullbacks who will need to shuttle up-and-down the field.
The downside is that longballs into the channels can leave you completely and utterly exposed, particularly against pacey players in wide areas. However, with two strikers upfront and a CAM feeding them, you'll be able to apply pressure in the final third consistently, pressing opponents into mistakes and effectively operating under the conditions of "offence is the best defence".
If this formation isn't attacking enough, then you could switch to a 4-3-2-1 if you find yourself behind in a game and need to quickly rack up a couple of goals. Alternatively, you could try 4-3-3 Attack, which will give you a bit more width and spreads your personnel evenly across the two attacking thirds. The downside to all of these is that there's not a lot of defensive stability, so you'll very much be looking to outscore your opponents if you opt for them.
FIFA 22: Best Custom Tactics for FUT
Deciding on the best formations for FUT is just one piece of the puzzle when building a formidable FUT 22 team: you'll also want to choose the best Custom Tactics for FUT as well. For all of the formations included above, we've provided example Custom Tactics, including Instructions, but none of these should be considered definitive. This is because a lot of what you select here will depend on your Players and what you're trying to achieve on the pitch. Many formations can become either offensive or defensive with just a few small adjustments.
Remember that you can create different Game Plans to suit an enormous variety of different scenarios, and you can change these mid-match by pushing left or right on the d-pad. If you're not sure what kind of Custom Tactics to employ for your formation, then we'd recommend you start out by keeping everything at its default settings. You can then hop into Squad Battles and start tinkering from there. For example, if you find that you're getting exposed in wide areas then you may want to consider adjusting your fullbacks' Attacking Runs instruction to Stay Back While Attacking. As you tinker, you'll begin to get a feel for the kind of Custom Tactics you want to leverage for your team.
If you're unsure of what the various Custom Tactics attributes actually do, then we've included a little more information for your reference below.
Defensive Tactics
Defensive Tactics, unsurprisingly, refers to your team's shape when your opponent has possession of the ball. This determines how your team tries to win back possession, and how your team works to prevent the opponent from scoring.
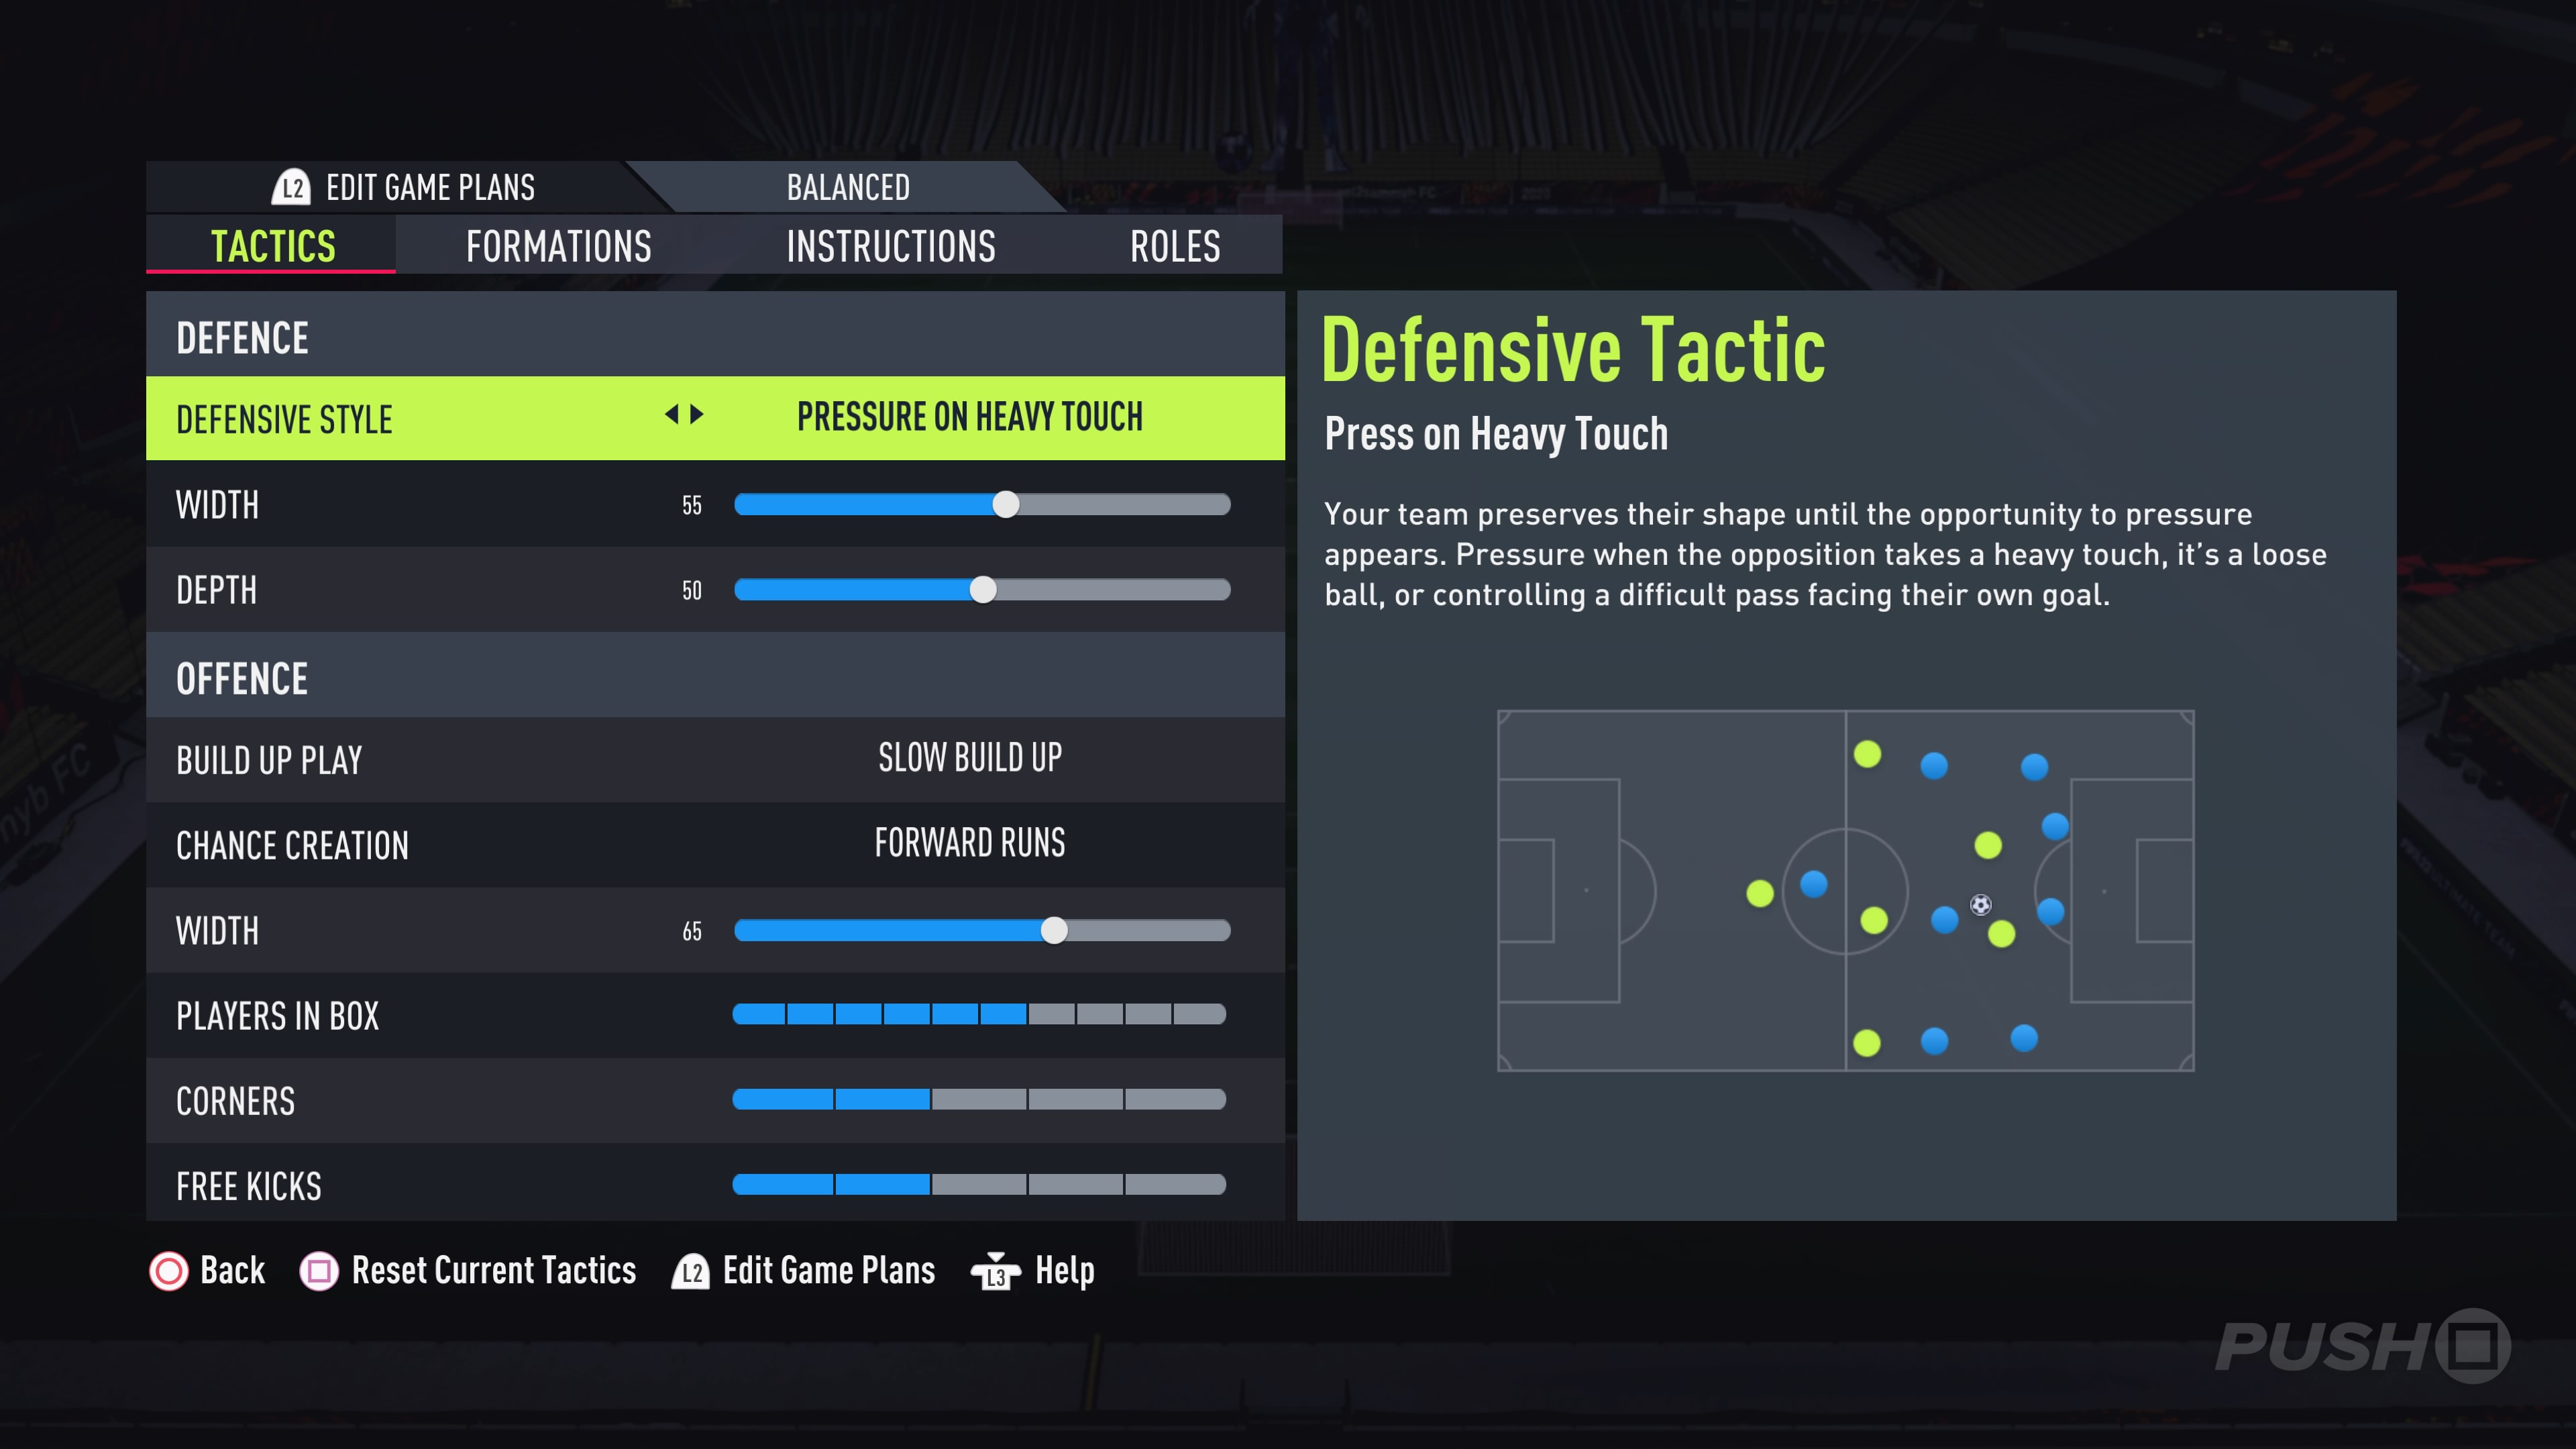
Defensive Style
- Balanced: Your team will adopt a neutral shape, without really pressing the opponent or dropping too deep.
- Press on Heavy Touch: Your team will attempt to predict when the opponent is about to make a mistake, and will then quickly close them down to capitalise on the error and quickly win the ball back.
- Press After Possession Loss: For seven seconds after losing the ball, your team will press the opponent hard in an attempt to win the ball back quickly. While this is powerful, it does come at the cost of significant stamina drain.
- Constant Pressure: Similarly to Press After Possession Loss, this will put your players on a rampage to regain possession. It'll significantly drain stamina, and isn't really recommended unless you're chasing the game.
- Drop Back: Your team will fall into a low block, ceding possession to your opponent but preventing them from threading the ball in behind you.
Width
- Width: Refers to how spread or compact your players are when out of possession. We'd recommend keeping this quite neutral due to how potent crossing is in FIFA 22.
Depth
- Depth: In theory, refers to where your players sit on the pitch when out of possession. However, due to the way players track runs in FIFA 22, your backline will adjust based on what the opponent is doing, thus we'd recommend keeping this on neutral and not tinkering with it too much.
Offensive Tactics
Offensive Tactics refers to how your team operates in possession. This includes how you build out from the back, and the approach your attackers take when outside your opponent's box. You settings here will determine how you penetrate your opposition's defence, and ultimately score goals.
Build Up Play
- Balanced: Your team will adopt a combination of all the different Build Up Play styles, allowing you to mix up your approach as you feel neccessary.
- Fast Build Up: Your teammates will break forward at pace, allowing you to get the ball forward at pace but potentially leaving you open to counterattacks if you lose possession along the way.
- Slow Build Up: Your teammates will come short and show for the ball allowing you to slowly build up possession from the back and move through the thirds of the pitch. Attackers will generally face up and show for the ball, as opposed to making incisive runs in behind.
- Long Ball: Useful if you have a large target man who can lead the line and who you can hoof the ball up to.
Chance Creation
- Balanced: Your teammates will hold their position when in the attacking third, making penetrating runs in behind either when you trigger them with L1 or when they feel it's the right time to do so.
- Possession: A good complement for Slow Build Up if you're a possession based player, your teammates will show short and look for the ball rather than running in-behind through the defensive lines.
- Forward Runs: Your teammates will look to penetrate the defence and get in-behind, at the expense of potentially being caught out if you lose possession during the build-up.
- Direct Passing: Rather than necessarily in behind, your teammates will try to pull the defence out of position by running into areas of space and looking for the ball. This works well if you have a pacey team capable of dragging defenders around.
Width
- Width: Refers to how spread or compact your players are when you have possession of the ball. If you're looking to spread the play then you'll want to bump this up, whereas if you want to be quite compact and play through the middle then you can move it down.
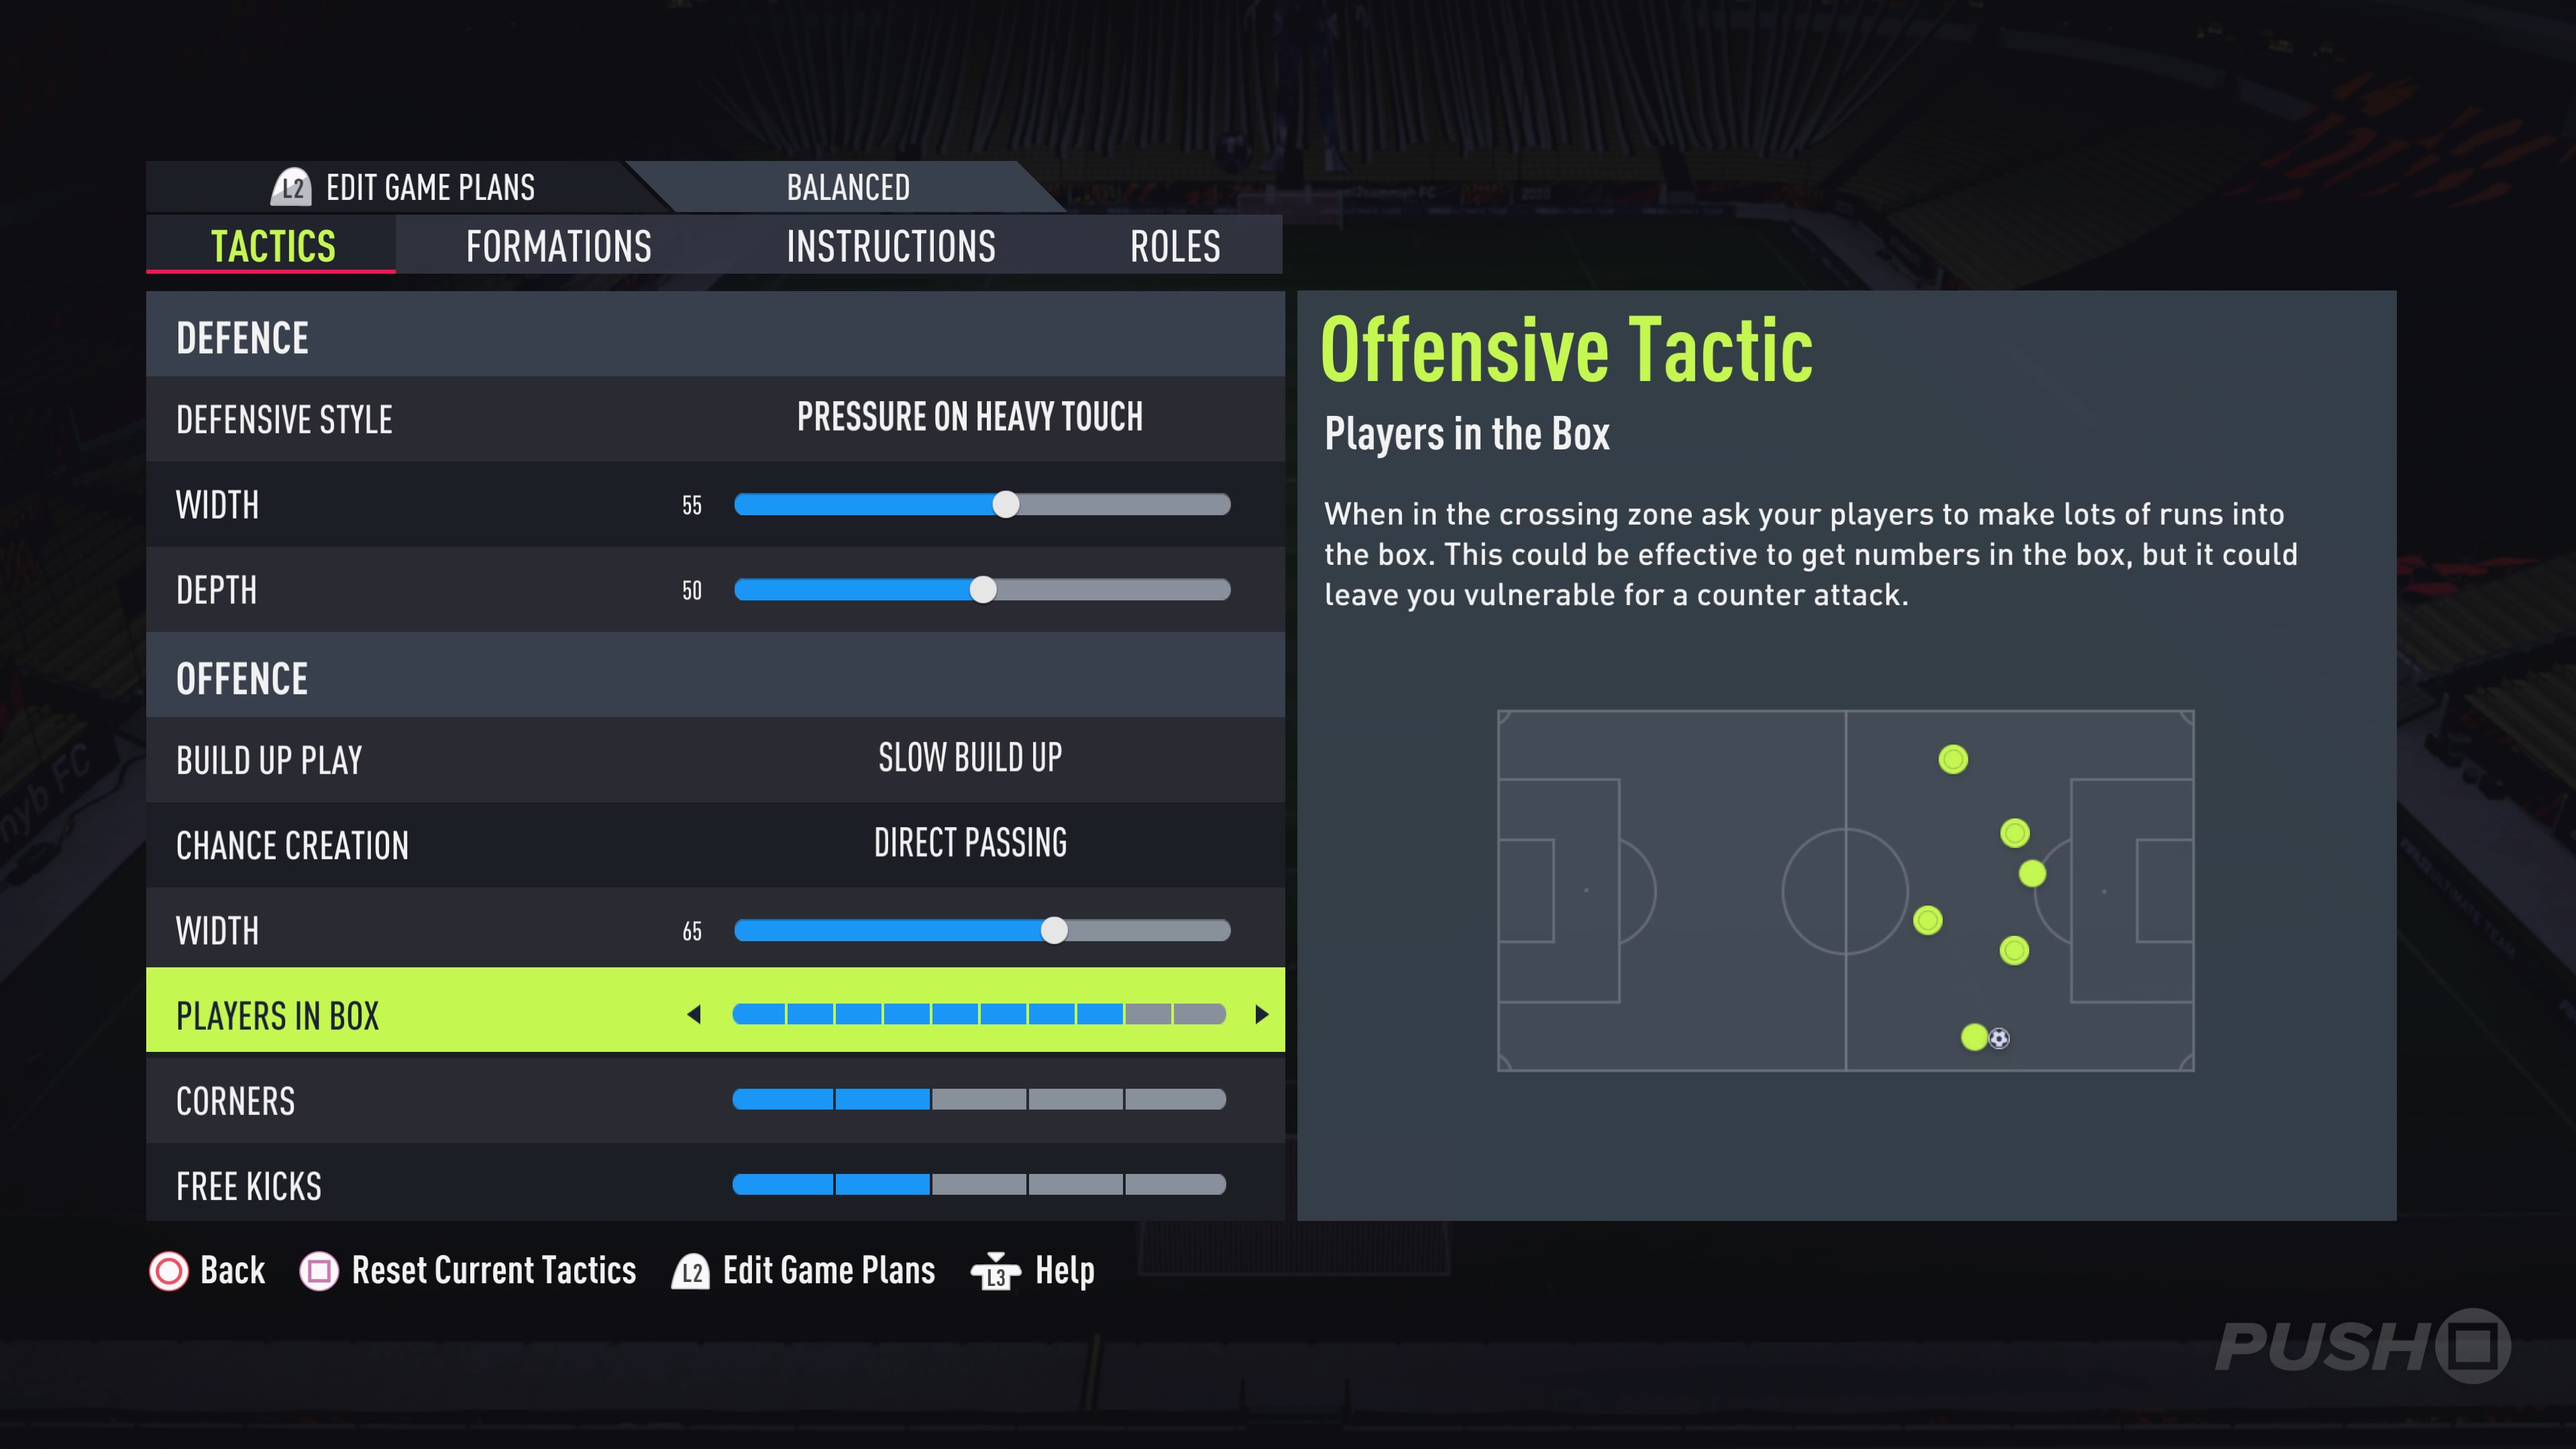
Players in Box
- Players in Box: Refers to how many players run into the box when you get into crossing situations. This can leave you open to the counter attack if you push too many players forward and subsequently cede possession.
Corners
- Corners: Refers to how many players enter the box during corners. A higher number here can leave you open to the counter attack if you lose possession during the set-piece.
Free Kicks
- Free Kicks: Similar to Corners, this refers to how many players get in the box during free kicks and set-piece scenarios. Again, it can leave you open to the counter attack if you select and high number here and subsequently lose possession.
What do you think is the best formations and custom tactics for FUT in FIFA 22? Check out our FIFA 22 guide, and let us know in the comments section below.
"tactic" - Google News
September 25, 2021 at 04:27AM
https://ift.tt/3kFom2u
FIFA 22: Best Formations and Custom Tactics for FUT - Push Square
"tactic" - Google News
https://ift.tt/2NLbO9d
Shoes Man Tutorial
Pos News Update
Meme Update
Korean Entertainment News
Japan News Update
Bagikan Berita Ini


0 Response to "FIFA 22: Best Formations and Custom Tactics for FUT - Push Square"
Post a Comment